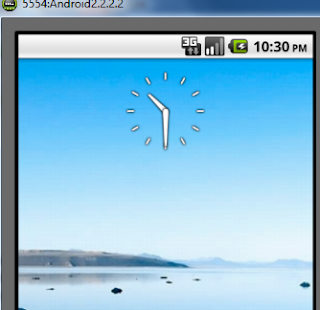
Android Widget
Widget are application which are run on home screen for quick access and easily inform you from current situation, like clock widget, weather widget, calender widget and much more like this. Now in this tutorial we want to develop Android Home Screen Widget Analog Clock. Complete tutorials and Source code are in this tutorials . Lest enjoy the Fun !
First Create new Project File>>New>>Android Project>>Project Name and APi
Now Open manifest File which are looking like this
<manifest xmlns:android="http://schemas.android.com/apk/res/android"
package="com.example.wallpaperwidth"
android:versionCode="1"
android:versionName="1.0" >
<uses-sdk
android:minSdkVersion="7"
android:targetSdkVersion="15" />
<application
android:icon="@drawable/ic_launcher"
android:label="@string/app_name"
android:theme="@style/AppTheme" >
<activity
android:name=".WidgetClock"
android:label="@string/_activity" >
<intent-filter>
<action android:name="android.intent.action.MAIN" />
<category android:name="android.intent.category.LAUNCHER" />
</intent-filter>
</activity>
</application>
</manifest>
Now Cut the
RED COLOR Activity Tag and and receiver tag Because Widget work like Broad Cast receiver Class.So add the following code on place of red color code of above manifest file
<receiver android:name=".ClockWidget"
android:label="@string/app_name">
<intent-filter>
<action android:name="android.appwidget.action.APPWIDGET_UPDATE" />
</intent-filter>
<meta-data android:name="android.appwidget.provider"
android:resource="@xml/widget_info" />
</receiver>
receiver name is the name of Java class which you extend form
appWidgetProvider . and second in the
<meta data> we used resource
widget_info which are the xml file where you adjust widget width , height , minimum time of update and some basic confguration.
Now Right click on
res folder of your project and create new folder name of xml and right click on xml folder and create new xml file
widget_info.xml
Following are the code of your Widget_info
<!--xml version="1.0" encoding="utf-8"?-->
<appwidget-provider xmlns:android="http://schemas.android.com/apk/res/android"
android:minWidth="294dip"
android:minHeight="74dip"
android:updatePeriodMillis="100000"
android:initialLayout="@layout/widget_xml">
</appwidget-provider>
Now We Discuss the red line of the code that is the layout of your widget just like we used layout for activity . The layout code are given below. In which we Simply add Analog Clock Control.
<RelativeLayout xmlns:android="http://schemas.android.com/apk/res/android"
xmlns:tools="http://schemas.android.com/tools"
android:layout_width="match_parent"
android:layout_height="match_parent"
android:gravity="center">
<AnalogClock
android:id="@+id/analogClock1"
android:layout_width="wrap_content"
android:layout_height="wrap_content"
android:layout_alignParentTop="true"
android:layout_alignRight="@+id/button1"
android:layout_marginTop="17dp" />
</RelativeLayout>
All of the Widget setting are complete Which are Common for every Widget you want to develop. widget are Broad cast receiver class which extend form AppWidgetProvider. Now We go to JAVA class widget.
public class Widget extends AppWidgetProvider {
//override desired method of this class
// onDelete()
// 0nUpdate()
// onDisable()
// onEnable()
}
We define
onUpdate method and write the following code on it to complete my widget project.
public void onUpdate(Context context, AppWidgetManager appWidgetManager, int[] appWidgetIds) {
final int N = appWidgetIds.length;
for (int i = 0; i < N; i++) {
int appWidgetId = appWidgetIds[i];
Intent intent = new Intent(context, Widget.class);
PendingIntent pendingIntent = PendingIntent.getActivity(context, 0, intent, 0);
RemoteViews views = new RemoteViews(context.getPackageName(), R.layout.widget_layout);
appWidgetManager.updateAppWidget(appWidgetId, views);
}
}
Now our projcet is complete.
Source code are following in zip folder.
Download Here
Refrences
Indroducing Home Screen Widget


0 Comments